Network Setup
How to configure the IP network for polyscope devices
Setting up the network
Connect devices
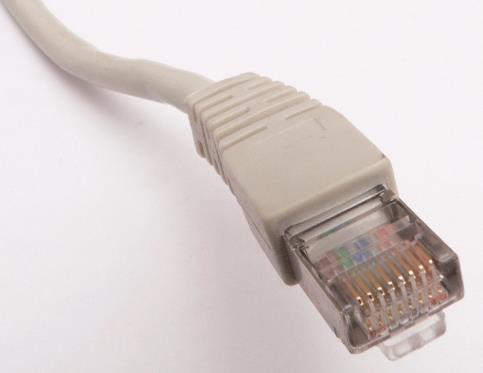
To establish the connection between the different machines, we go through an IP network. This network is formed by connecting the various devices using RJ45 network cables.
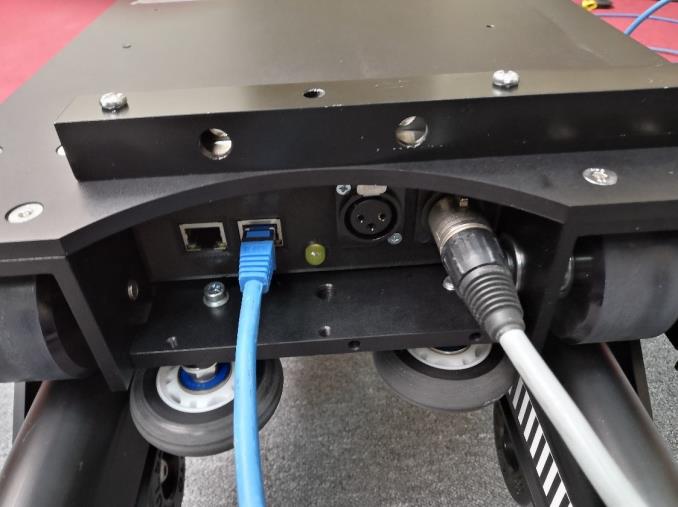
They connect to the various polyscope robots via the Ethernet sockets. Below is a photo of the Ethernet sockets on a UFO/slider.
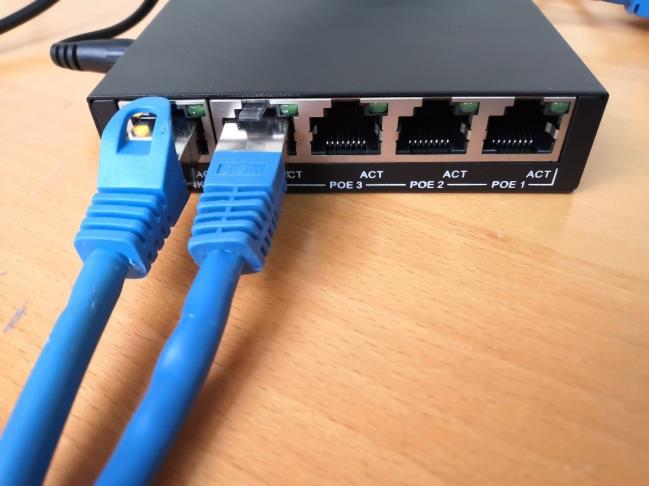
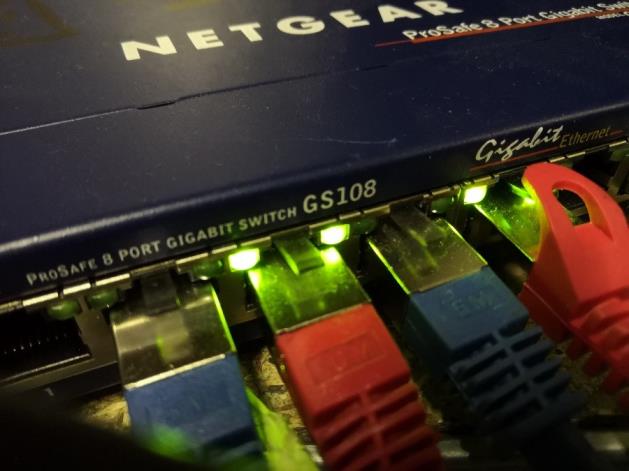
To have a network of several machines, we do not connect the devices end-to-end. Instead, each device is connected to a network switch that redirects each communication to the machines concerned. Below is a switch with 2 RJ4R cables connected.
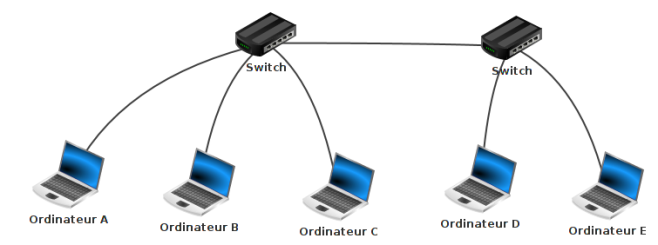
To schematize a network will look like this:
Check that each device is properly connected
Once the network is set up and each device is powered on, you can do a quick check of the connections. A device is communicating if the LEDs on its network port are flashing. Note that the flashing does not necessarily have to be regular.
Identify connected devices
Now that all the devices are connected to the network, they must be configured to communicate with each other. The first step is therefore to identify each device. To do so, there are several methods.
Easiest method
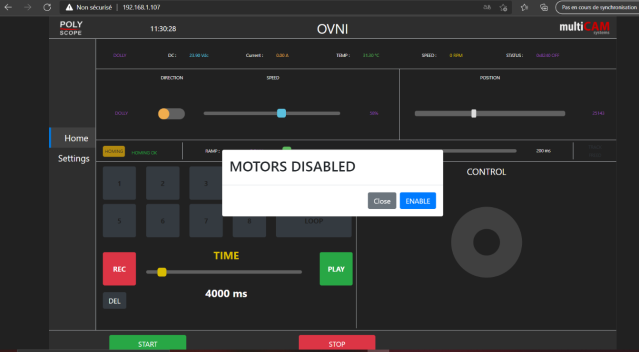
The first and simplest is to see if the IP is noted on the robot. If this is the case, you can enter this IP directly into a web browser (from a PC connected to the network) and check that you are indeed on a web page, like this one for a UFO:
With RM-IP
On the multicam computer you can find a software named RM-IPSetupTool, if it is not available, you can download it for free from the sony website. All recent polyscope devices are compatible with this software which allows them to be identified. Once RM-IP is launched, you will come across the following interface:
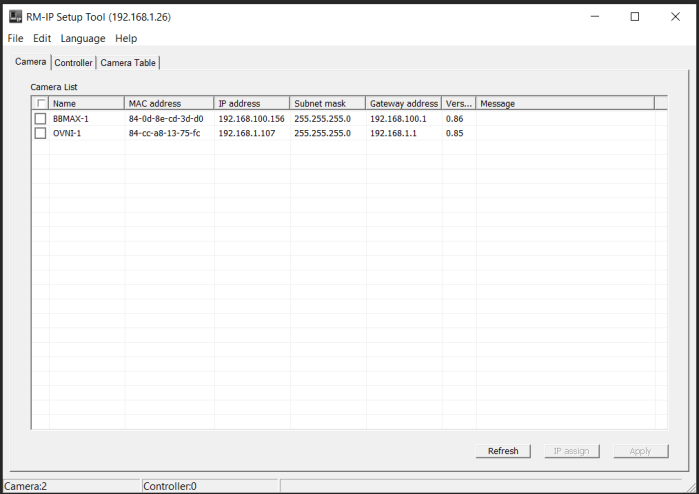
On each line, the information of interest to us is the robot's name and IP address. The computer's IP is also given (underlined in blue). We can see here that our IP (192.168.1.26) is not on the same subnet as the bbmax-1 (babycam maxi) which is at 192.168.100.156. This is problematic because it prevents communication. The method to solve this problem is detailed in part III.
RM-IP normally identifies all devices on the network. However, if a device still does not appear, or RM-IP is not available, there is one last method to test.
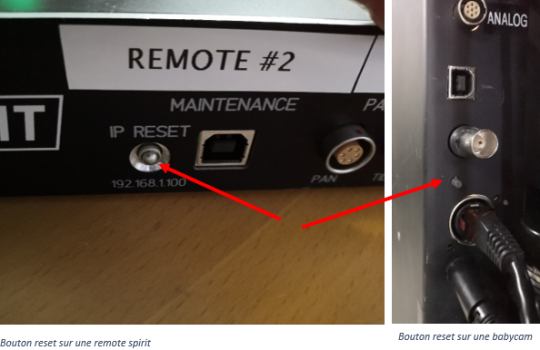
reset button
On each polyscope robot there is an IP RESET button which allows you to temporarily change the IP of the device to 192.168.1.100. To use it, unplug the robot and press the button while turning the device back on. You can now access the webpage via 192.168.1.100
The passage of the IP to 192.168.1.100 is momentary, at the next start the IP will return as it was before, unless you modify it. To modify an IP several methods are possible, they are detailed in the following part.
Reconfigure the network
It is possible that the network is linked to the local network of the studio, in particular to set up the freeD (protocol for augmented reality). It is therefore conceivable that all the IPs are not available and even that the range of IPs used is different. In this part we will therefore focus on how to reconfigure each device to give it an adequate IP.
Change IPs from RM-IP
RM-IP allows you to directly modify the IP of a device, just click on the IP to modify and change the field as presented below. Once the field has been modified, all you have to do is click on “Apply” to cause the change of IP.

Change IPs from web interfaces
It is also possible to modify the IP via the web interface of each robot. To access it enter the old IP in the web browser. Then go to the setting page, modify the ip and save the settings with the Apply button.
The method changes a little on the interface of a remote. Please refer to the remote configuration documentation for more details.
Change PC IP
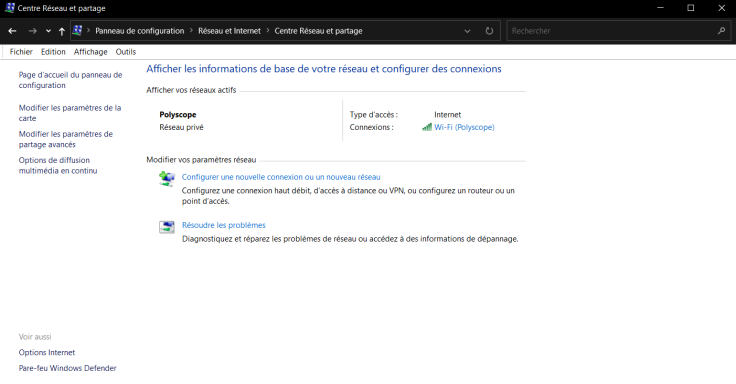
If the PC cannot access the web pages of the machines, it may be that its IP is not on the right range. Here we will detail how to modify the IP of a PC under Windows.
If the PC cannot access the web pages of the machines, it may be that its IP is not on the right range. Here we will detail how to modify the IP of a PC under Windows.
Go to Control Panel > Network and Internet > Network and Sharing Center, then Change adapter settings.
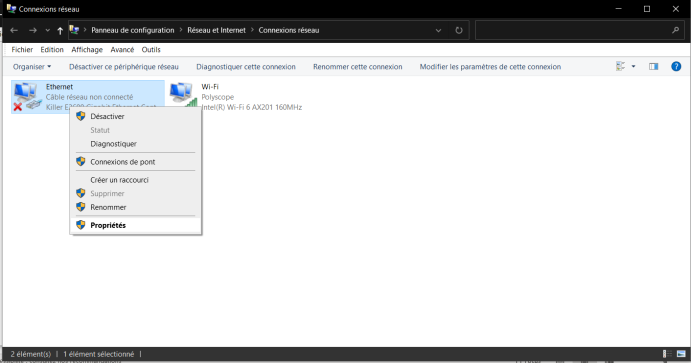
Right click on Ethernet and go to properties
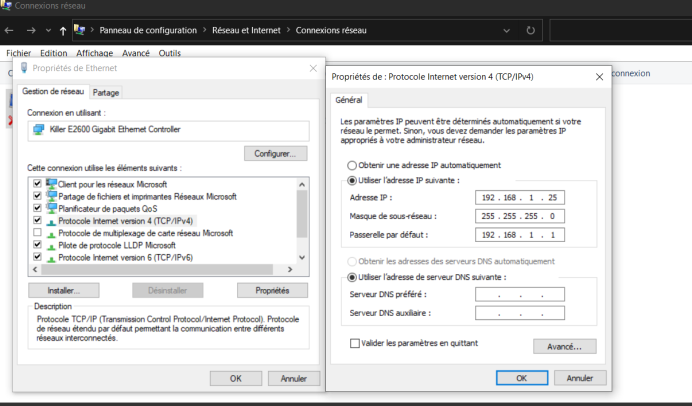
In the properties double-click on “Internet Protocol version 4 (TCP/IPv4)”.
The window that opens then allows you to modify your IP as well as the mask and the gateway. The gateway to put is your IP by replacing the last number with 1.
For example if the IP you enter is 192.168.100.26, the gateway will be 192.168.100.1
The subnet mask is rarely to be modified, it must be left at 255.255.255.0
Once the changes have been made, press OK.
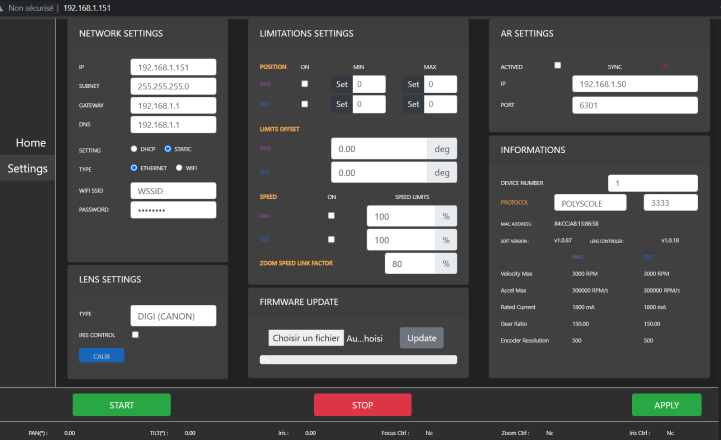
freeD setting
In this part we will discuss how to activate freeD on polyscope machines, it will only be a question of software, the theme of gen-lock will not be discussed.
In the settings of a robot you will find at the top left AR SETTINGS, check ACTIVATED and select the IP and the port on which the freeD will be read. Don't forget to save by pressing APPLY.
